
Automotive Smart Film: Installation & Wiring Tutorial
A comprehensive guide for installing CX Automotive Smart Film using the wet-application method. Includes critical 12V-to-65V wiring configurations for safe and reliable vehicle integration.
I. Preparation: Tools & Pre-Checks
- 1. Safety First & PlacementRecommended for: front/rear side windows, rear windshield, and panoramic roofs. WARNING: Installation on the front windshield is NOT recommended due to visibility reduction at slanted angles and the risk of sudden frosting during power loss.
- 2. Supply Form ConfirmationConfirm if you are working with Finished Film (factory cut, electrodes attached) or Roll Film (requires on-site cutting and electrode preparation).
- 3. Tools & ChecklistGather cleaning cloths, spray bottles, squeegees, utility knives, and measuring tools. Verify the power supply plan (12V to 65V converter) and re-check window dimensions. Leave a margin when cutting roll film.
II. Detailed Installation Steps (Wet Application)
- 4. Clean the GlassClean the window thoroughly with water or cleaning solution to remove dust, oil, and glue residue. A cleaner surface ensures a flatter installation.
- 5. Position the FilmPlace the film gently onto the glass for initial positioning. The non-adhesive structure allows for free movement and angle adjustment during this phase.
- 6. Wet ApplicationSpray clean water on the glass. Align the film accurately. Use a squeegee to press firmly from the center outward to remove water and air. Check for and eliminate any bubbles or wrinkles immediately. Do not stretch the electrode area.
III. Vehicle Wiring Configurations
Choose from the official 12V-to-65V converter configurations based on the project requirements.
Method 1: Multi-Window Synchronous (Cigarette Lighter)
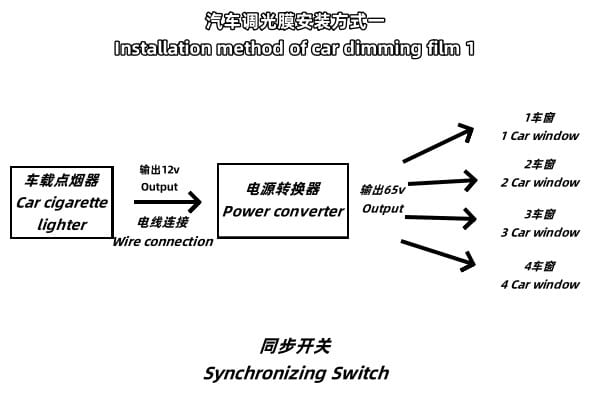
Flow: Cigarette Lighter (12V) → Power Converter (65V Output) → 1-4 Windows
Best For: Business vehicles, fleet projects, multi-window unified control.
Method 2: One Window, One Controller (Independent)
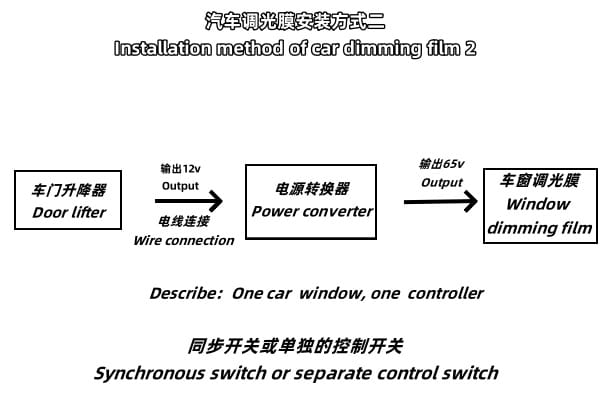
Flow: Door Lifter (12V) → Power Converter (65V Output) → Window Film
Best For: Independent single-window control, localized privacy, personalized retrofit projects.
Method 3: Centralized Power (Fuse Box)
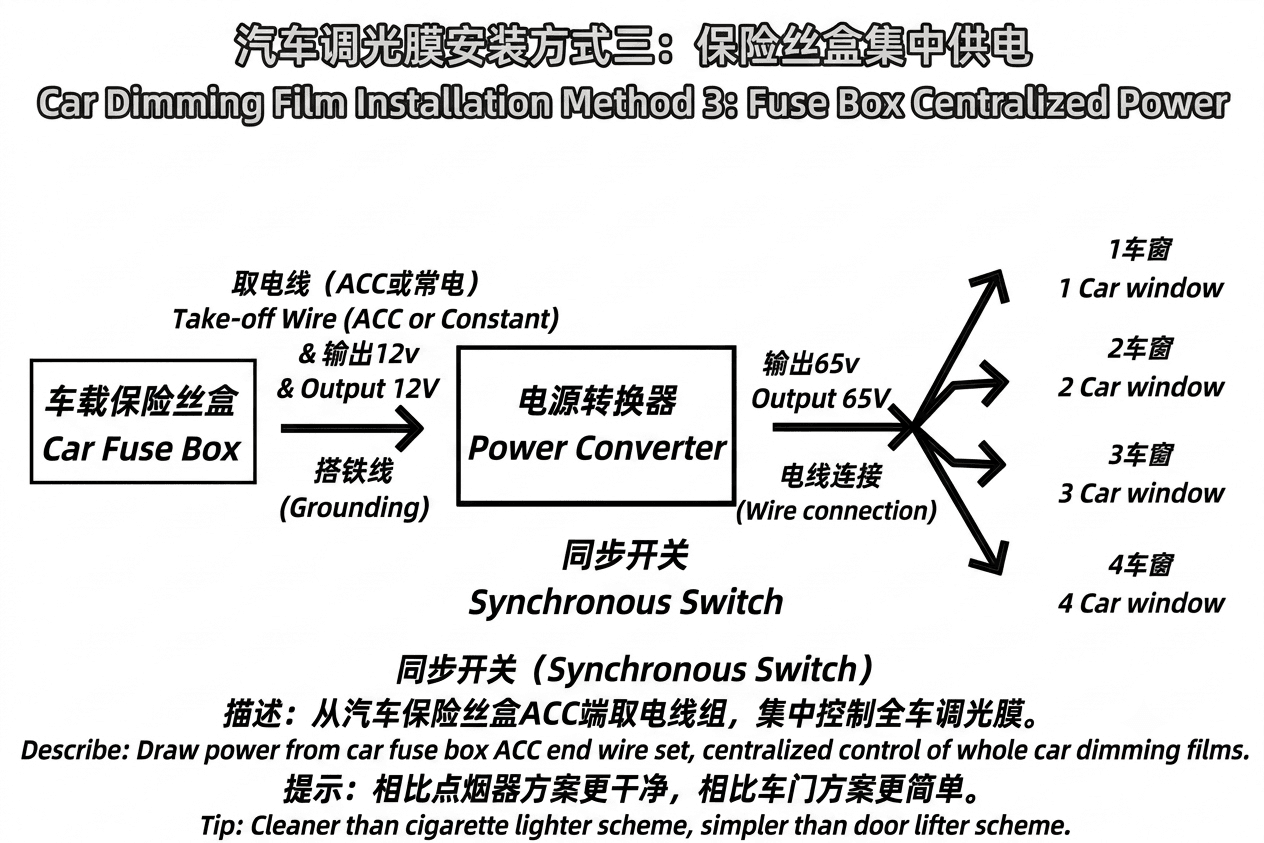
Flow: Fuse Box ACC (12V) → Power Converter (65V Output) → 1-4 Windows
Best For: Unified layout, cleaner installation than the cigarette lighter method. Ideal for batch retrofits.
IV. Safety & Professional Tips
- Wiring Insulation: Wrap all joints tightly with insulation tape to prevent moisture and short circuits. Secure backup wires safely.
- Vehicle Integrity: Ensure connections are firm to avoid power loss. Avoid damaging original vehicle seals or door panel components.
Need offline documents?
Download the complete Automotive Smart Film installation guide and wiring schematics.